Getting Started with the RealSenseTM D455
By Hassan Kamel, Mouser Electronics
Published June 22, 2021
Introduction
Humans have eyes that enable them to see, but what do robots have? Scientists and engineers have been working for
decades to develop technology that allows computers to see and perceive their environment the way we humans do.
The growing field of machine vision deals with finding new and better ways to give machines the ability to
visualize, understand and interact with their surroundings. Intel’s RealSense D455 is one of the leading
cameras used for machine-vision applications. The depth camera uses stereoscopic vision to help robots better
understand shapes, objects, and space and enable them to move around in a 3D world. If you’re interested
to know how to set up your camera and begin working on your next machine vision project, follow this
step-by-step guide that covers everything you need to know to get started with the RealSense D455.
Project Materials and Resources
Access the project’s
BOM on Mouser’s website for the required components:
Software and Tools
- Ubuntu
- ROS Robot Operating Software
- Intel RealSense SDK
Project Technology Overview
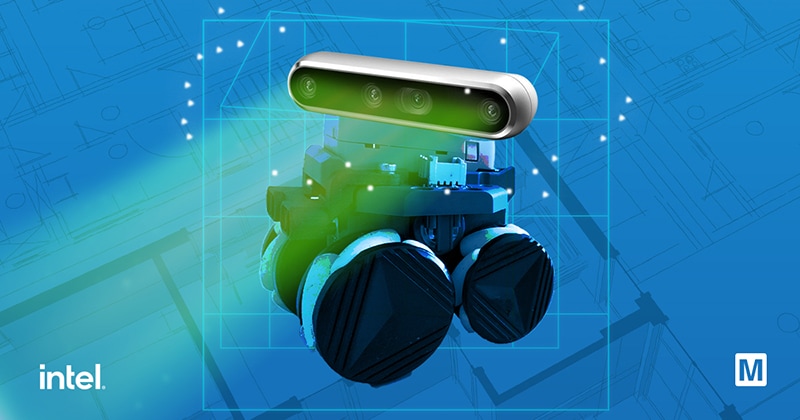
Intel RealSenseTM Depth Camera D455
The Intel® RealSense™ Depth Camera D455 is designed to equip devices with the ability
to see, understand, and learn from their environment. Using stereo cameras, the D455 can calculate depth. A left
imager, a right imager, and an optional infrared projector are used to implement stereo vision. To enhance depth
accuracy in scenes with low texture, the infrared projector emits a non-visible static IR pattern. The left and
right imagers capture the scene and send raw image data to the Vision Processor, which calculates depth values
for each pixel by correlating points on the left image to the right image. The depth frame is then generated by
processing the depth pixel values. Following depth frames create a depth video stream.
Figure 1: Intel® RealSense™ Depth Camera D455
(Source: Mouser Electronics)
ROS (Robot Operating System)
ROS is an open-source, meta-operating system for robots. It provides the expected services from an operating
system, including hardware abstraction, low-level device control, commonly used functionality, message-passing
between processes, and package management. It also provides tools and libraries for obtaining, building,
writing, and running code across multiple computers.
Software Setup
Ubuntu Installation
To work with ROS, it is recommended to install Ubuntu as it’s the most supported operating system for
robotic applications. We will use Ubuntu 18.04.05 LTS Bionic Beaver for this project. Download the desktop image
“ubuntu-18.04.5-desktop-amd64.iso” and proceed with the setup.
ROS Installation
As we are using Ubuntu 18.04.05 LTS, we will be working with ROS Melodic. However, if you are using Ubuntu 16 or
Ubuntu 20, you should instead install ROS Kinetic or ROS Noetic, respectively.
Table 1: ROS version to use according to Ubuntu version used
|
Ubuntu version
|
ROS version
|
|
16
|
Kinetic
|
|
18
|
Melodic
|
|
20
|
Noetic
|
Launch a Terminal and perform the following steps to install ROS Melodic:
- Configure your Ubuntu repositories to allow “universe”, “multiverse”, and
“restricted” using the commands:
$ sudo add-apt-repository universe
$ sudo add-apt-repository multiverse
$ sudo add-apt-repository restricted
- Set up your computer to accept software from packages.ros.org:
$ sudo sh -c 'echo "deb http://packages.ros.org/ros/ubuntu $(lsb_release -sc) main" >
            /etc/apt/sources.list.d/ros-latest.list'
- Set up your keys:
$ sudo apt-key adv --keyserver 'hkp://keyserver.ubuntu.com:80' --recv-key
            C1CF6E31E6BADE8868B172B4F42ED6FBAB17C654
(If you get a network error at this step, make sure that you’re not connected to your company’s
network as the firewall might be blocking the requested URL)
- Make sure your Debian package is up-to-date:
$ sudo apt update
- Install the full desktop version:
$ sudo apt install ros-melodic-desktop-full
(If you get an error at this step, install the desktop version: $ sudo apt install
ros-melodic-desktop)
- Set up environment:
$ echo "source /opt/ros/melodic/setup.bash" >> ~/.bashrc
$ source ~/.bashrc
- Install dependencies for building ROS packages:
$ sudo apt install python-rosdep python-rosinstall python-rosinstall-generator python-wstool
            build-essential
$ sudo rosdep init
$ rosdep update
Intel RealSense SDK Installation
Now that ROS Melodic is installed, we will proceed with installing the Intel RealSense SDK 2.0. The SDK is a
cross-platform library for the RealSense depth cameras. It provides intrinsic and extrinsic calibration
information, depth and color streaming, as well as synthetic streams, such as pointcloud, depth aligned to
color, and vise-versa. To install the SDK, unplug any connected Intel RealSense cameras and follow these steps:
- Update your Ubuntu distribution and get the latest stable kernel:
$ sudo apt-get update && sudo apt-get upgrade && sudo apt-get dist-upgrade
- Download/Clone the librealsense github repository:
$ git clone https://github.com/IntelRealSense/librealsense.git
- Navigate to the librealsense root directory:
$ cd ~/librealsense/
- Install core packages:
$ sudo apt-get install git libssl-dev libusb-1.0-0-dev pkg-config libgtk-3-dev
- Install distribution-specific packages (for Ubuntu 18):
$ sudo apt-get install libglfw3-dev libgl1-mesa-dev libglu1-mesa-dev at
- Run the permissions script:
$ ./scripts/setup_udev_rules.sh
- Build and apply patched kernel modules:
$ ./scripts/patch-realsense-ubuntu-lts.sh
- Create build directory and navigate to the directory:
$ mkdir build && cd build
- Run CMake (builds librealsense along with demos and tutorials):
$ cmake / -DBUILD_EXAMPLES=true
- Recompile and install librealsense binaries:
$ sudo make uninstall && make clean && make && sudo make install
ROS Wrapper for Intel RealSense Devices Installation
The next step will be to install the ROS Wrapper for Intel RealSense Devices. These are packages that enable you
to use the RealSense depth cameras with ROS. For installation, perform the following steps:
- Create a catkin workspace:
$ mkdir -p ~/catkin_ws/src
$ cd ~/catkin_ws/src/
- Clone the latest Intel® RealSense™ ROS into 'catkin_ws/src/':
$ git clone https://github.com/IntelRealSense/realsense-ros.git
$ cd realsense-ros/
$ git checkout `git tag | sort -V | grep -P "^2.\d+\.\d+" | tail -1`
$ cd ..
- Run:
$ catkin_init_workspace
$ cd ..
$ catkin_make clean
(If you get a cmake error, make sure ddynamic_reconfigure is installed in
'catkin_ws/src/’:
git clone https://github.com/pal-robotics/ddynamic_reconfigure.git)
$ catkin_make -DCATKIN_ENABLE_TESTING=False -DCMAKE_BUILD_TYPE=Release
$ catkin_make install
- Setup environment:
$ echo "source ~/catkin_ws/devel/setup.bash" >> ~/.bashrc
$ source ~/.bashrc
- Install further packages for SLAM (Simultaneous Localization and Mapping):
$ sudo apt-get install ros-melodic-imu-filter-madgwick
$ sudo apt-get install ros-melodic-rtabmap-ros
$ sudo apt-get install ros-melodic-robot-localization
Testing the installed Software
Here is an example of how to start the camera node and make it generate a pointcloud. Make sure your camera is
plugged in and open RViz to view the pointcloud:
$ roslaunch realsense2_camera rs_camera.launch filters:=pointcloud
Then open another terminal tab and type in: RViz is automatically installed with the ROS desktop package.
$ rviz
Once RViz is up and running, do the following steps:
- Change the fixed frame to camera_link
Click on the Add button, and a settings menu should appear. Then click on the By
Topic tab.
- Under /color -> /image_raw double click on image
- Under /depth -> /color -> /points double click on PointCloud2
- Finally, click on Ok.
Figure 2: Rviz settings (Source: Mouser Electronics)
In the following image, you can see how the points cloud image is created.
Figure 3: Points cloud image (Source: Mouser Electronics)
To open the RealSense viewer, run:
$ realsense-viewer
Figure 4: Intel® RealSense™ Viewer (Source: Mouser
Electronics)
Conclusion
This tutorial covered all the necessary steps to install the required software to get started with the
Intel® RealSense™ D455. This project can be extended to perform SLAM using the D455 and the
software we just installed. The camera can be mounted on an RC car to generate 3D maps of rooms and offices
autonomously.
Author Bio
 Hassan Kamel joined Mouser
Electronics in 2021
as a Working Student. He graduated with a Bachelor’s degree in Electrical Engineering from the Technical
University of Munich in 2020 and is now pursuing a Master’s degree at the same university. With a great passion
for electronics, Hassan creates technical content in projects and tutorials using the latest products sold at
Mouser.
Hassan Kamel joined Mouser
Electronics in 2021
as a Working Student. He graduated with a Bachelor’s degree in Electrical Engineering from the Technical
University of Munich in 2020 and is now pursuing a Master’s degree at the same university. With a great passion
for electronics, Hassan creates technical content in projects and tutorials using the latest products sold at
Mouser.
 Canada


